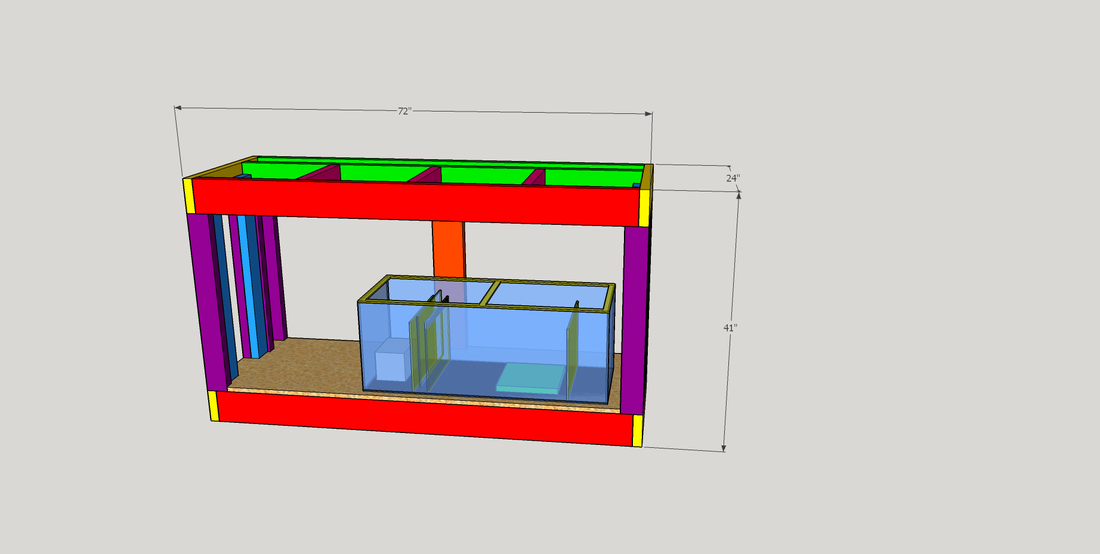
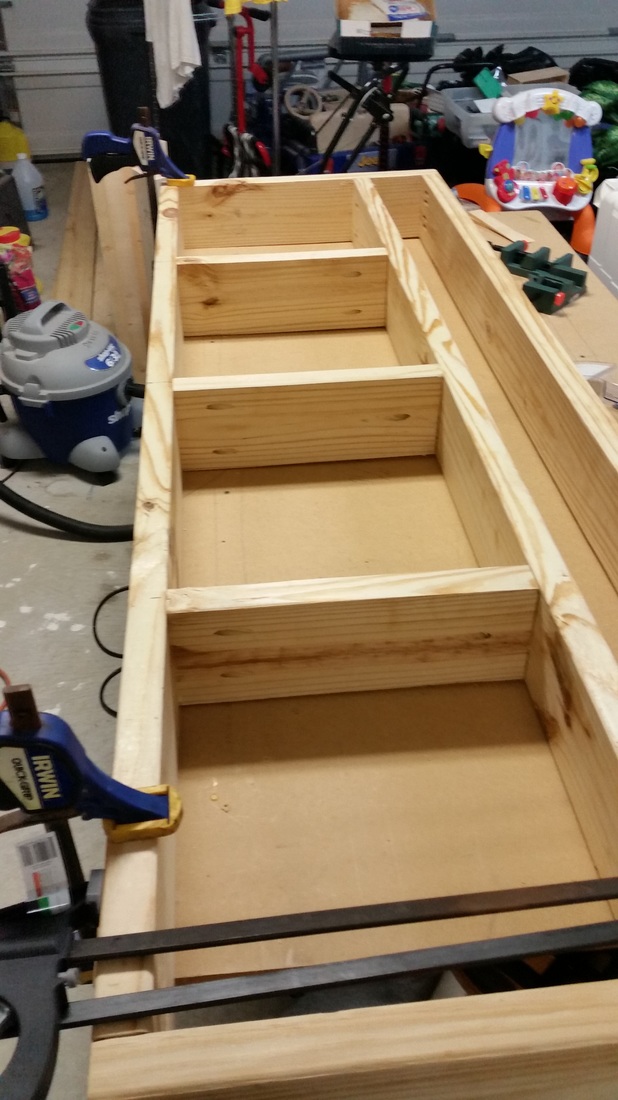
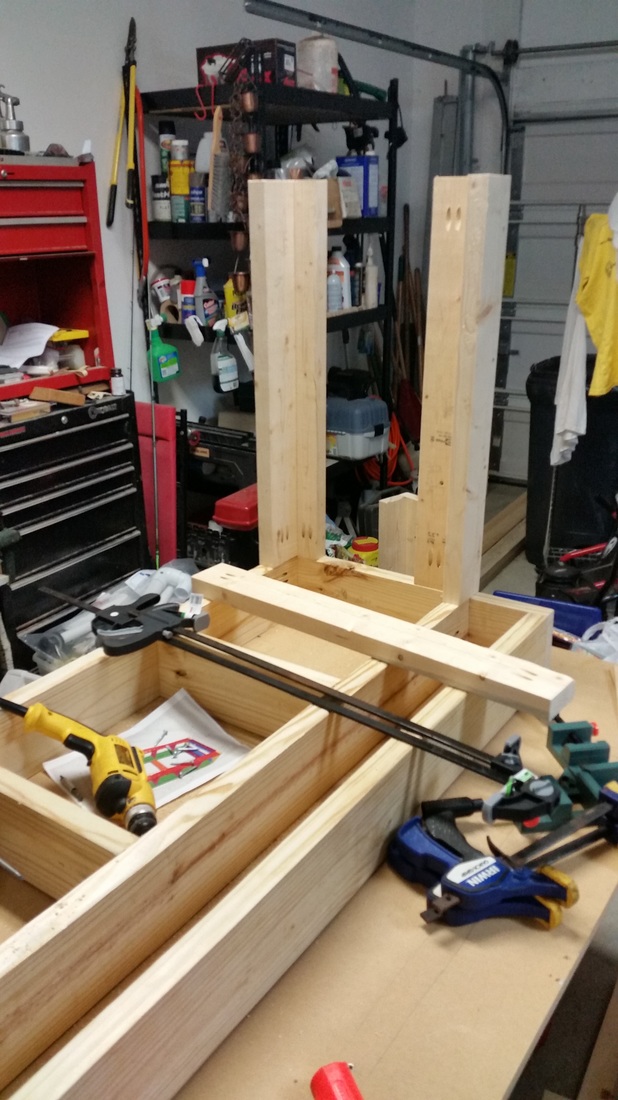
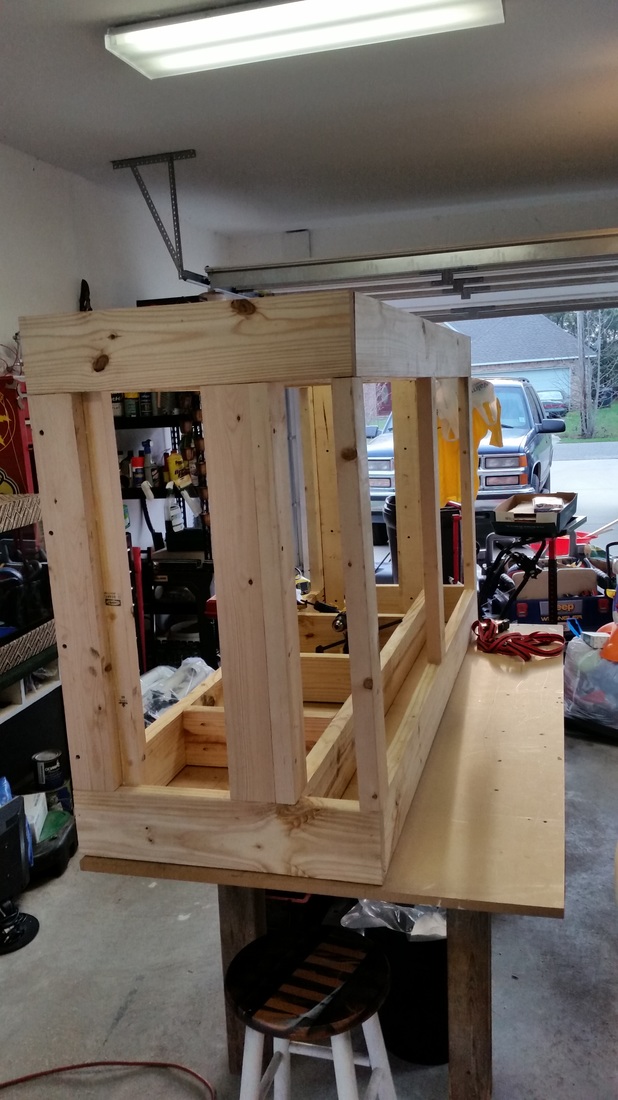
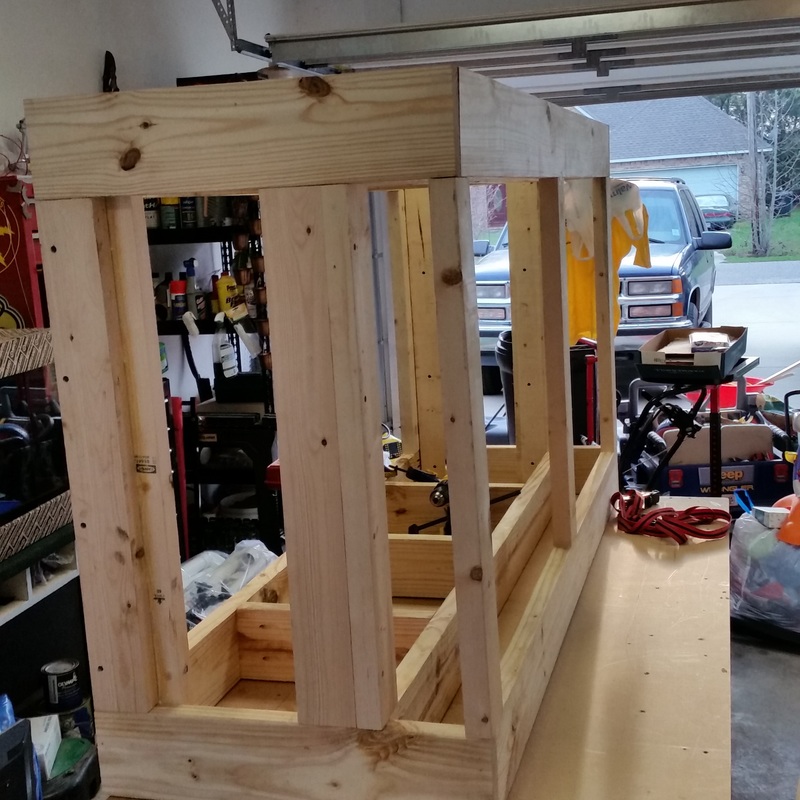
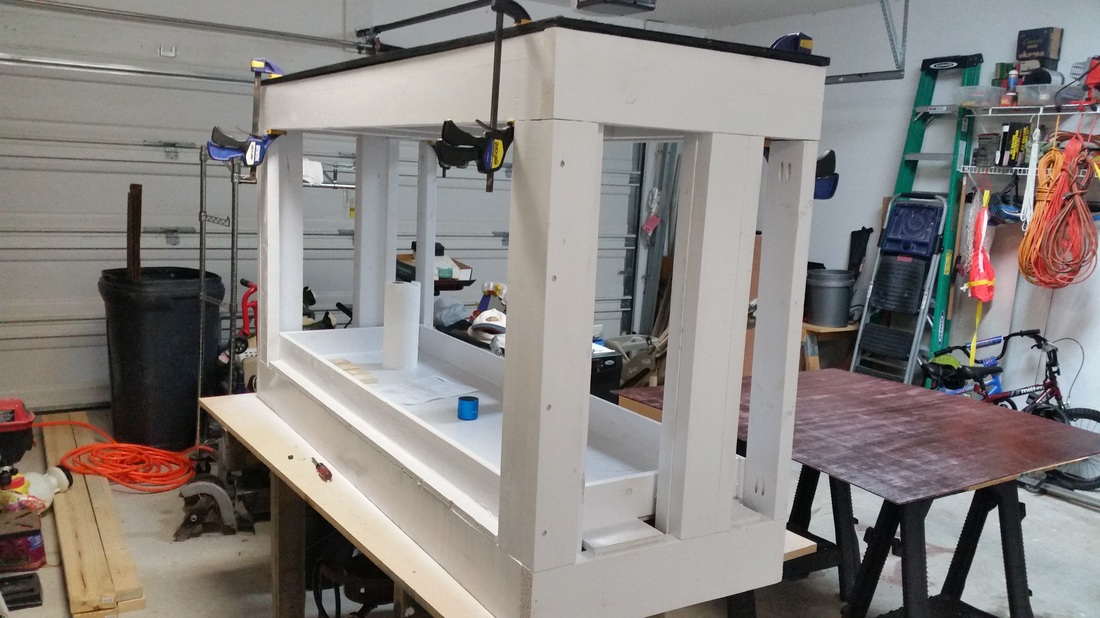
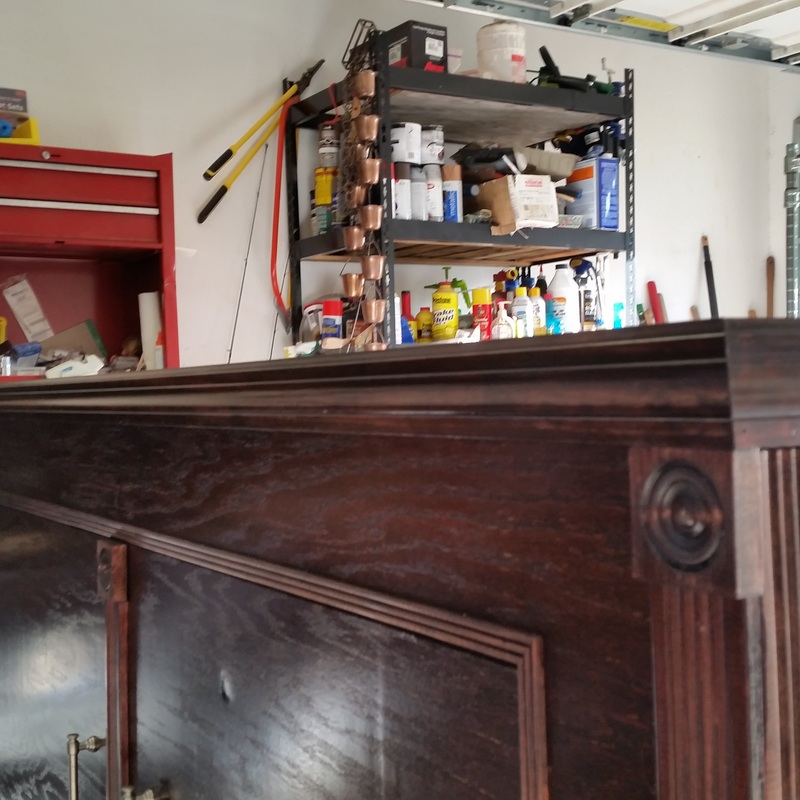
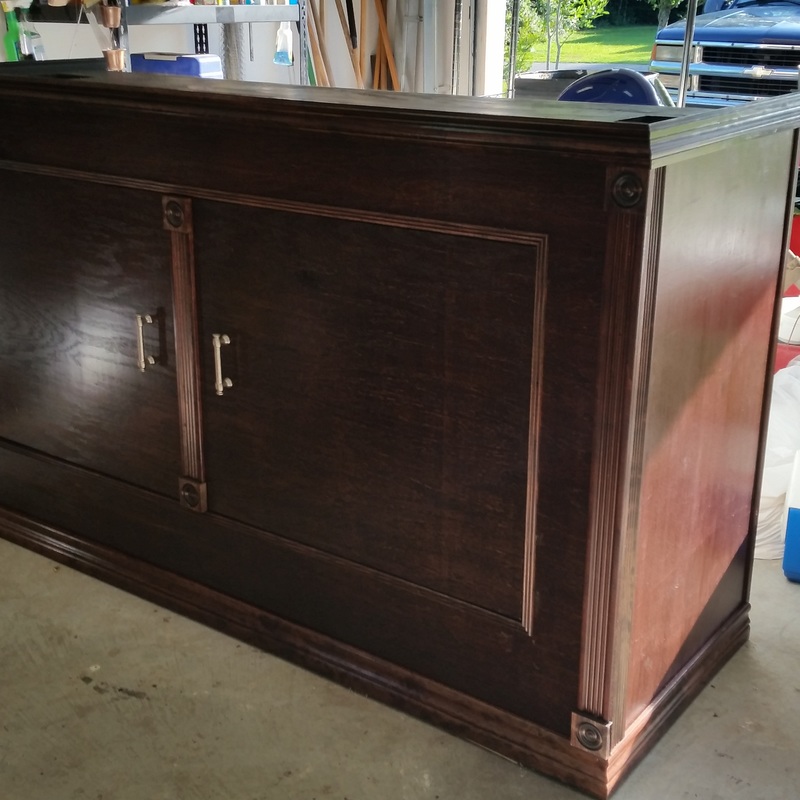
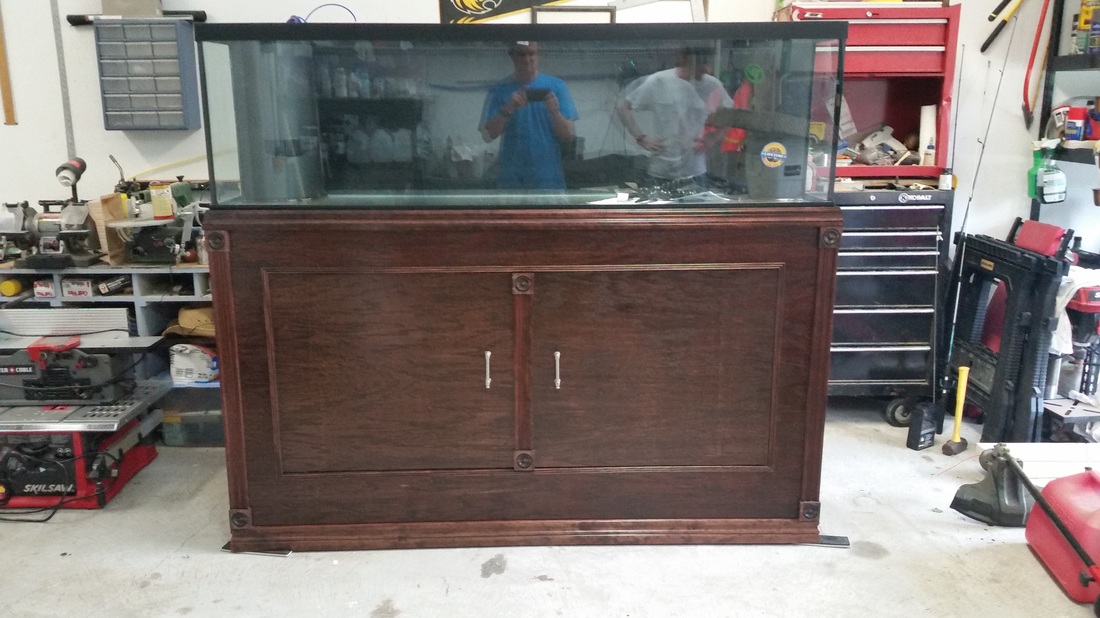
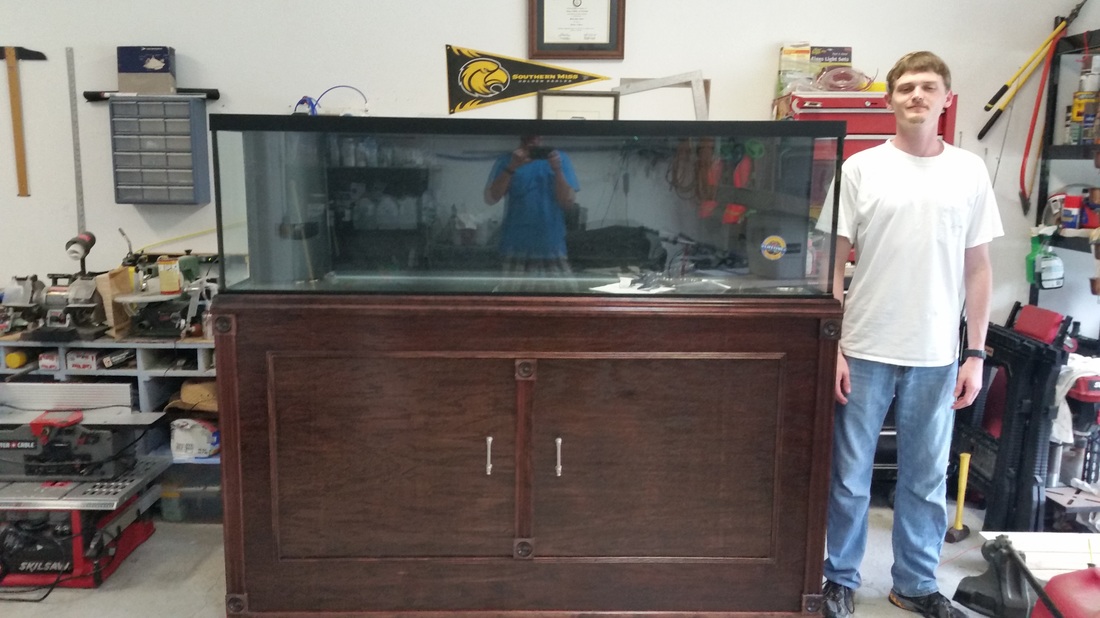
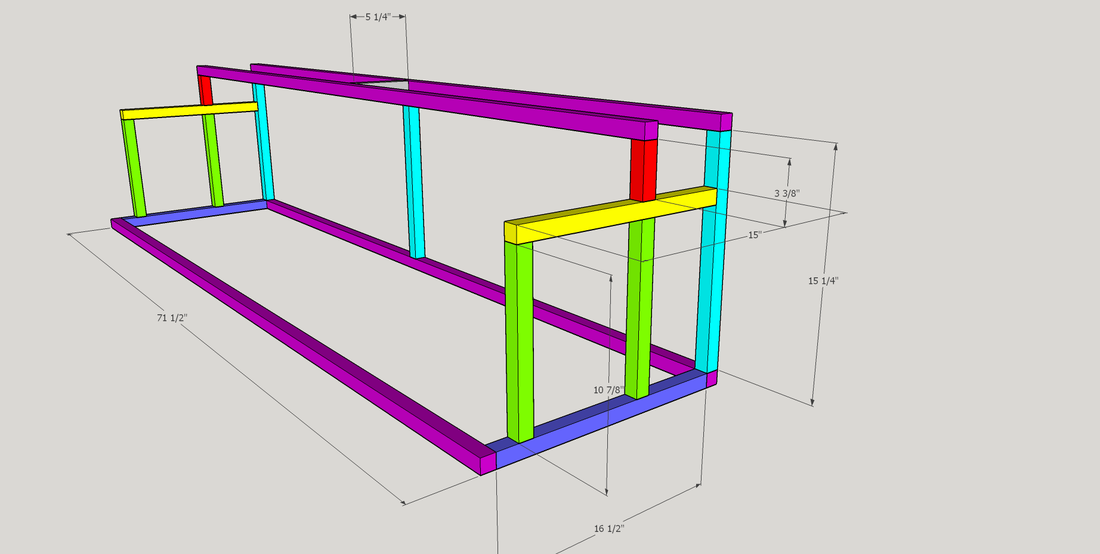
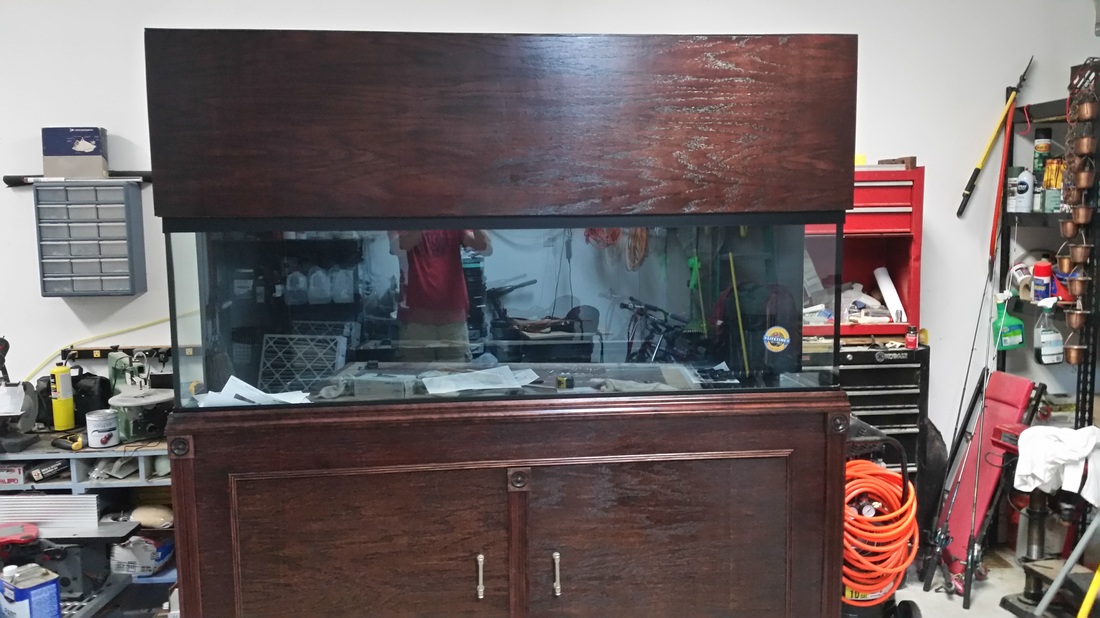
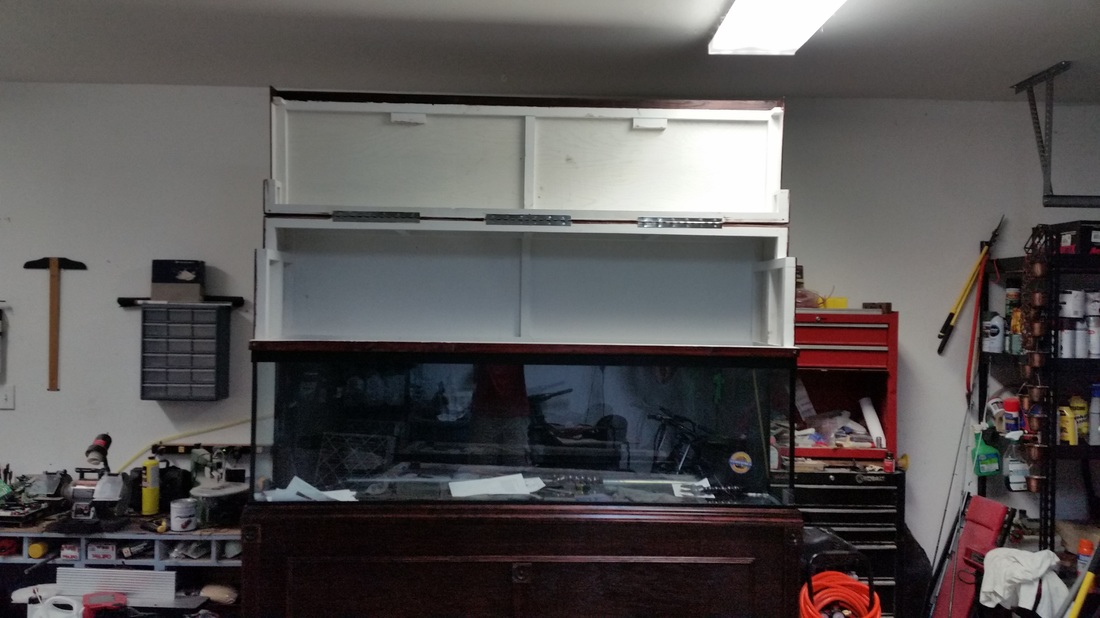
125g Stand, Canopy, Sump and ATO Build:
Here are pics of the stand, canopy, ATO and sump builds. While the tank is only 18" deep I made the stand a full 24". The more room the merrier!


DIY LED Build:
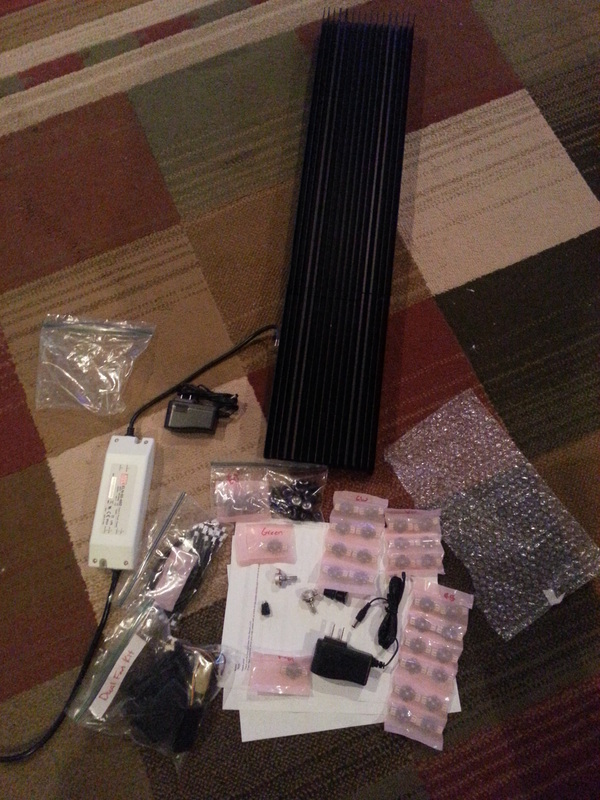
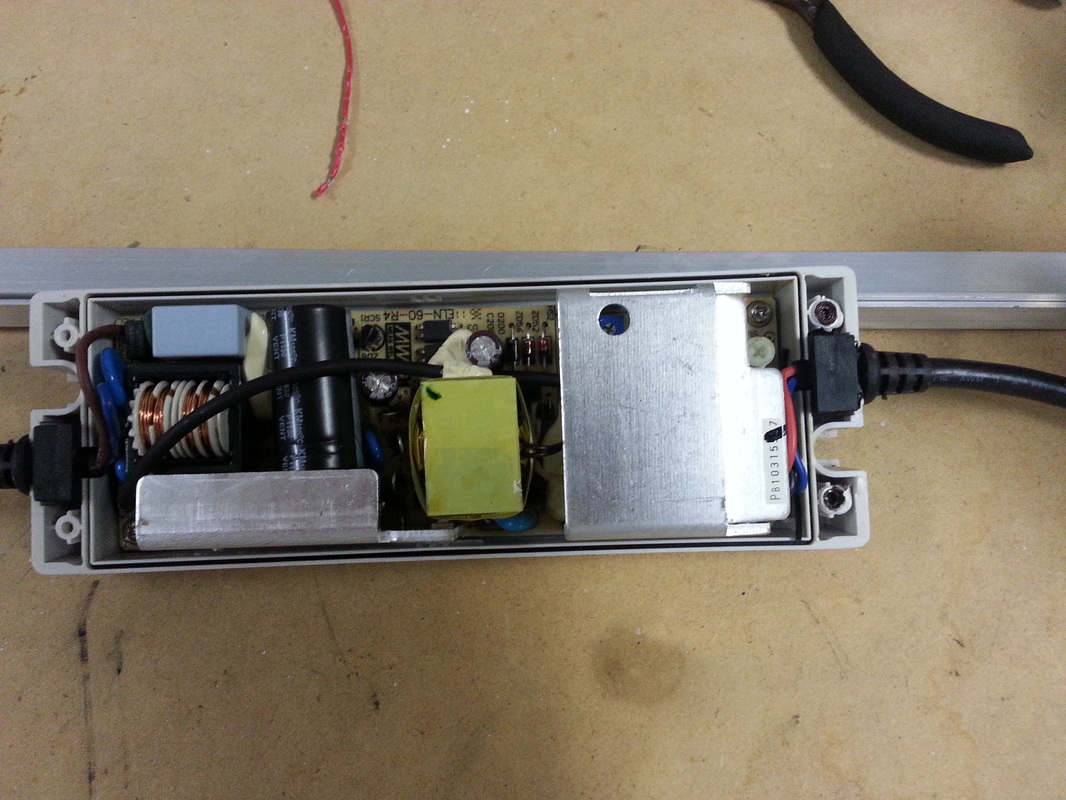
I've wanted to have LED's over the tank for several years, but cost always prevented me from having them. I finally saved the money and decided to go with a DIY build using Rapid LED. I ordered 28 LED's; 1 green, 1 red, 6 UV, 8 cool white and 14 royal blue. I also ordered a 20" and 10" heat sinks, fans, fan controls, one driver (traded coral for two others), a dimming kit, adhesive, wire and various other pieces parts. Rapid offers two options for their LED's: solder or solderless. I chose the solderless pucks as they are much easier (obviously) to work with.
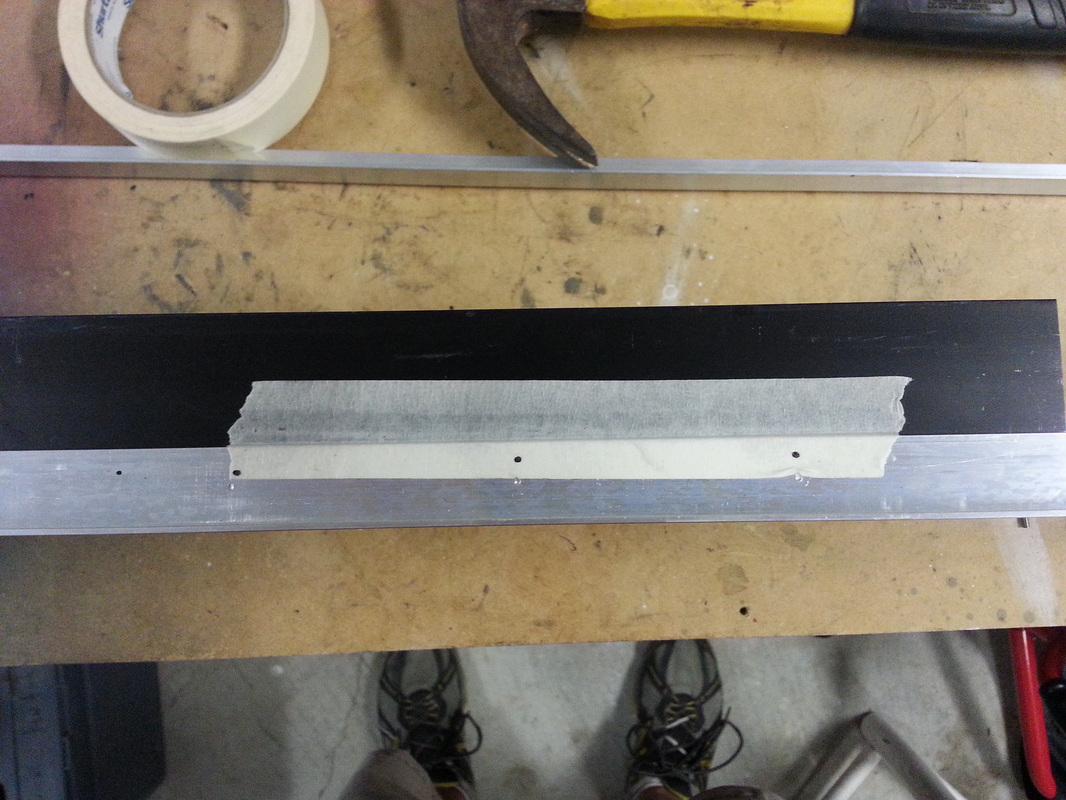
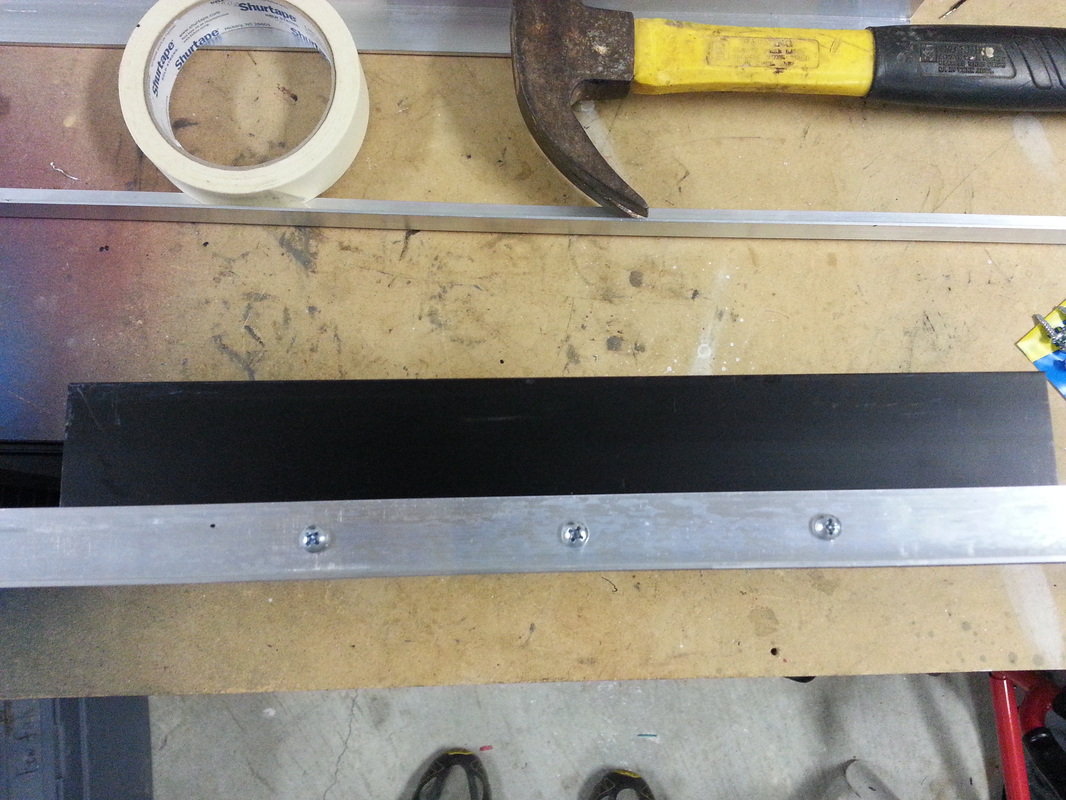
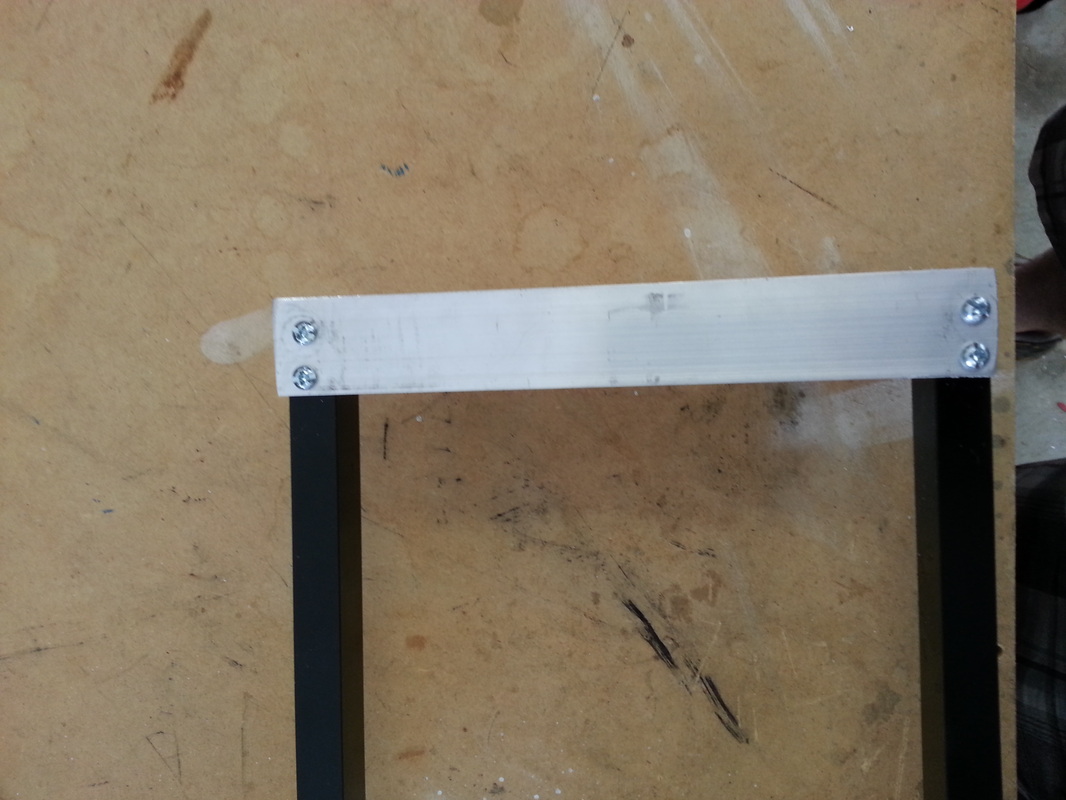
I decided to use aluminum angle as the side rails and to use larger angle for the ends to attach the lights to the tank canopy. I also used acrylic sheeting as a shelf to mount the drivers.
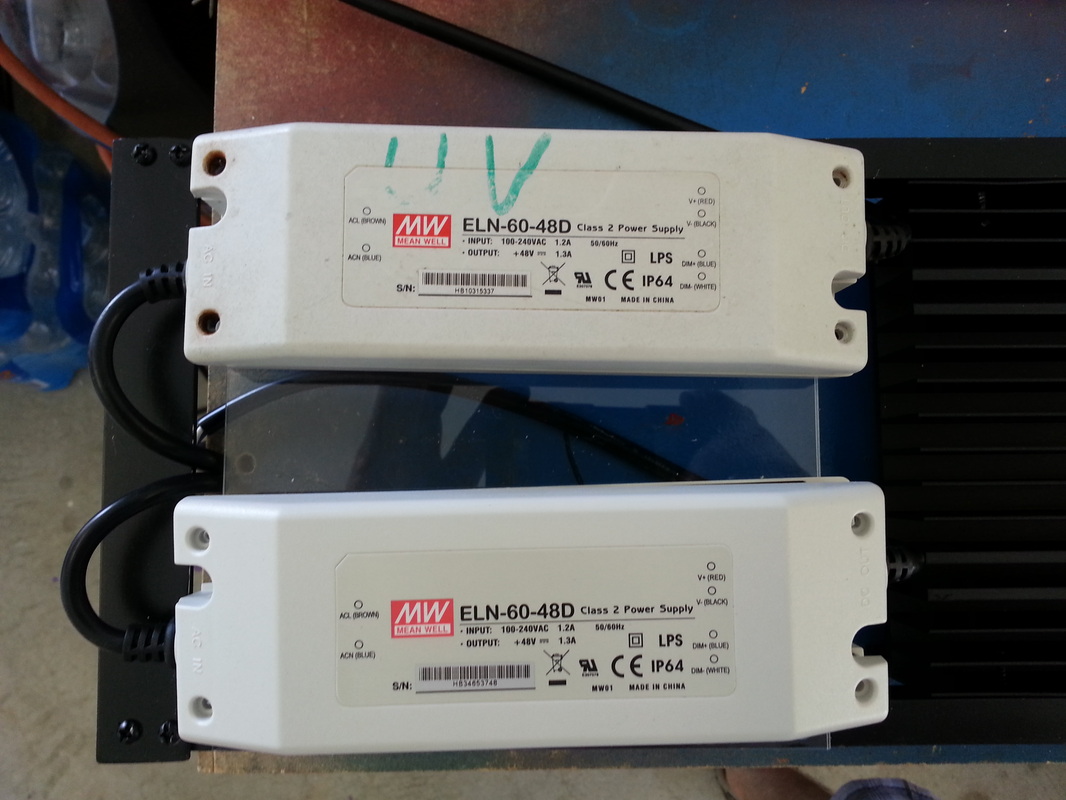
I will be running three drivers on this system: one non-dimmable will run the UV's as they can only handle 700mA of current; and the two dimmable ones will run the whites, blues and the red and green pucks. I chose to do this so that I could tune down the intensity so I don't burn my corals.
I've wanted to have LED's over the tank for several years, but cost always prevented me from having them. I finally saved the money and decided to go with a DIY build using Rapid LED. I ordered 28 LED's; 1 green, 1 red, 6 UV, 8 cool white and 14 royal blue. I also ordered a 20" and 10" heat sinks, fans, fan controls, one driver (traded coral for two others), a dimming kit, adhesive, wire and various other pieces parts. Rapid offers two options for their LED's: solder or solderless. I chose the solderless pucks as they are much easier (obviously) to work with.
I decided to use aluminum angle as the side rails and to use larger angle for the ends to attach the lights to the tank canopy. I also used acrylic sheeting as a shelf to mount the drivers.
I will be running three drivers on this system: one non-dimmable will run the UV's as they can only handle 700mA of current; and the two dimmable ones will run the whites, blues and the red and green pucks. I chose to do this so that I could tune down the intensity so I don't burn my corals.
Below are DIY projects that I made for my reef tank and others.
ACRYLIC PROBE HOLDER:
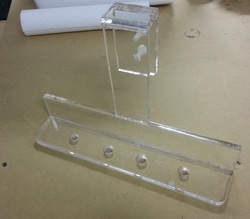
I worked out a deal with a friend and made him this probe holder. It is designed to sit on the side of his sump and the nylon thumb screws on the back lock it down. I made it from 3/8" acrylic and it took about a half a day. This was probably the easiest build I've ever done!
ACRYLIC SUMPS AND ATOs:
I make sumps and ATO containers on the side for people. I built this 56 gallon sump for a fellow reefer in Birmingham. All of the parts were cut on a C&C machine and it made wonderful joints. Really proud of how that came out.
For a fellow reefer, I built a custom ATO container. He started a tank build and asked me to build his sump and a container for his ATO water. The sump was a 40g breeder that I installed the baffles for him. First time I worked with glass but it came out very well. I was really proud of his ATO build because of the fitted top. Because kalk reacts with CO2 to form CaCO3 it helps to minimize direct contact, so I designed/built the container with the tight fitting lid.


Water Change System Containers:
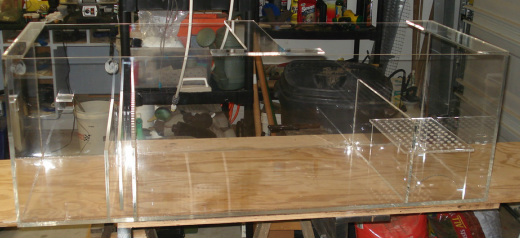
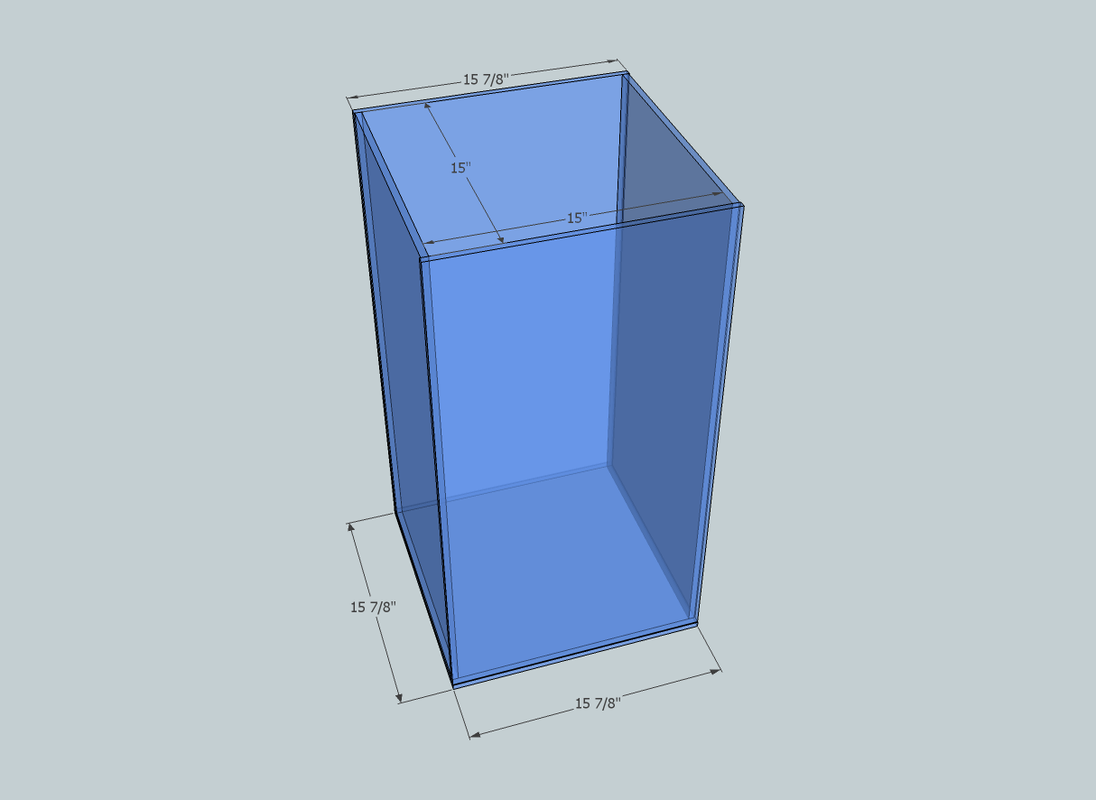
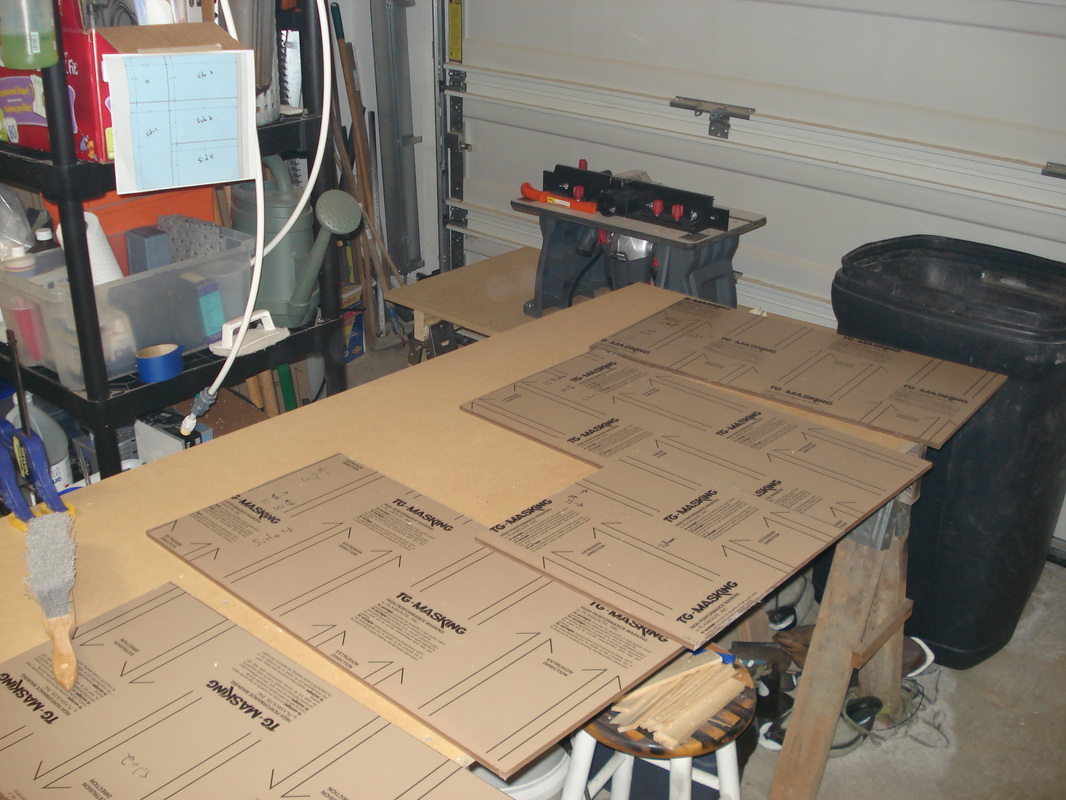
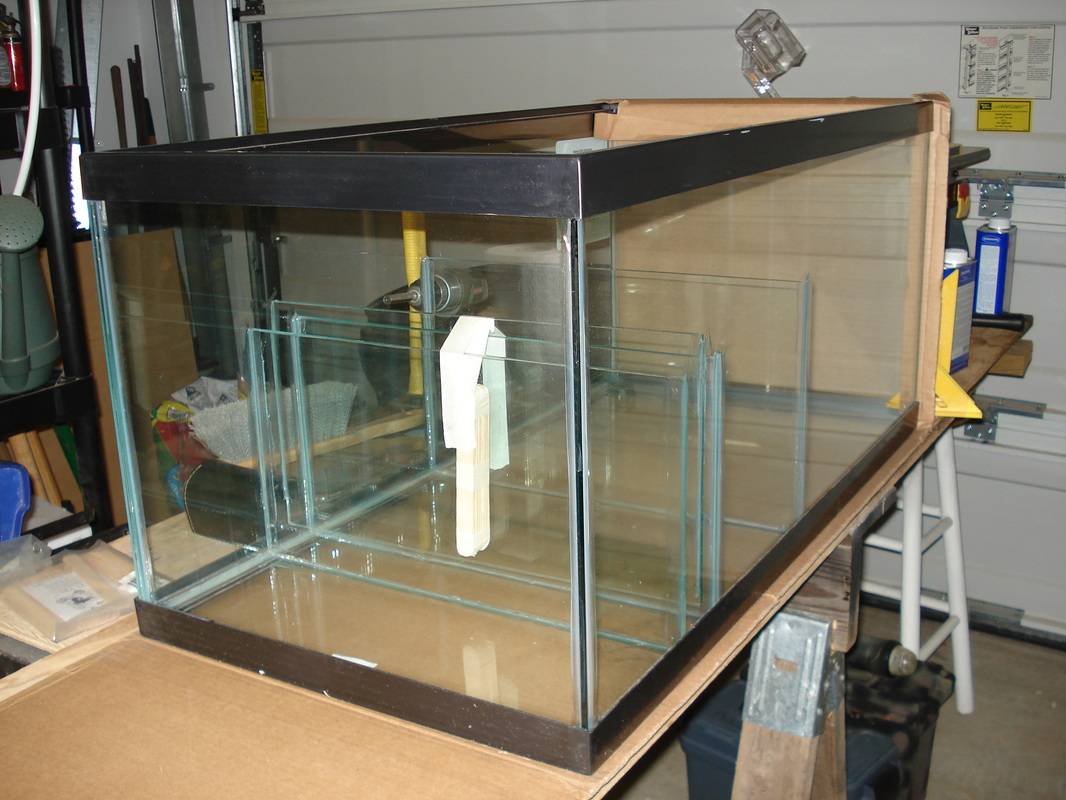
A fellow reefer has 210g system and devised a way to use two containers to do top off and water changes. He requested two containers that would fit inside his stand within a 15"x15" space. To maximize the volume I made the units 30" tall making the volume 29 gallons per unit. I made these out of 3/8" cast acrylic instead of 1/4" so there would be little to no deflection of the sides. I can honestly say these were harder to build than anything else and I feel this was because of limited work space from the inside. 15" is NOT a lot of room! This time I used a different technique to polish the edges, where normally I polish using polishing compounds and a polishing wheel, this time I used a MAPP gas torch. It is very effective and fast, but you must be careful to not burn the acrylic. Using the torch made the edges look like smooth polished glass. This will be my preferred method from now on.
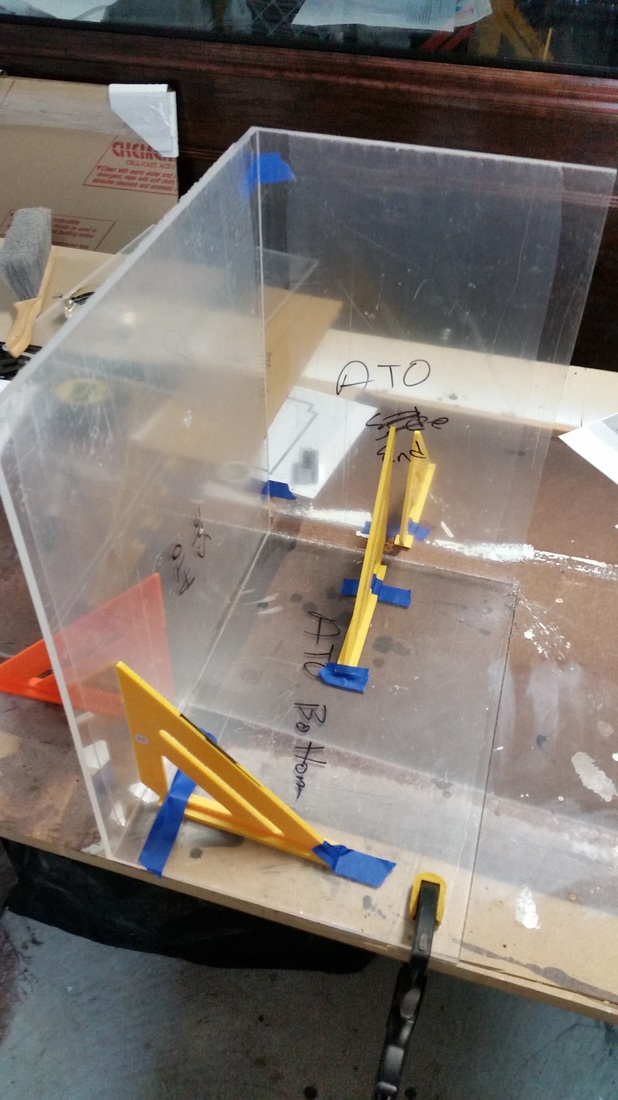
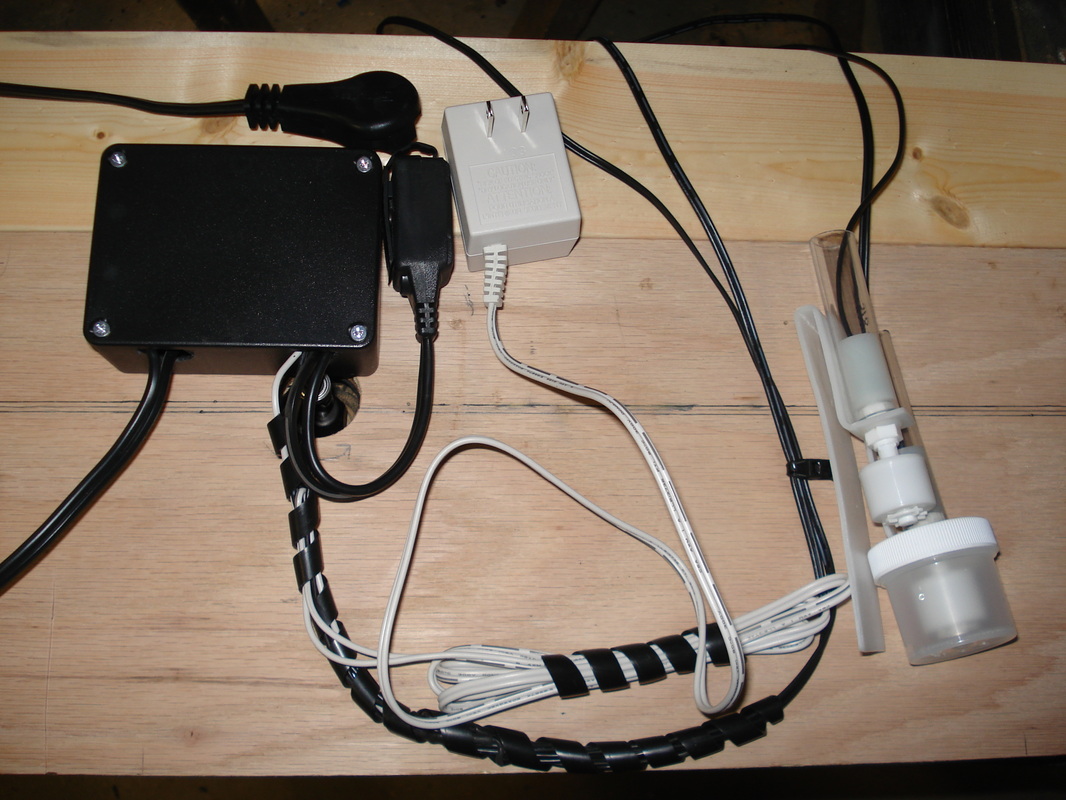
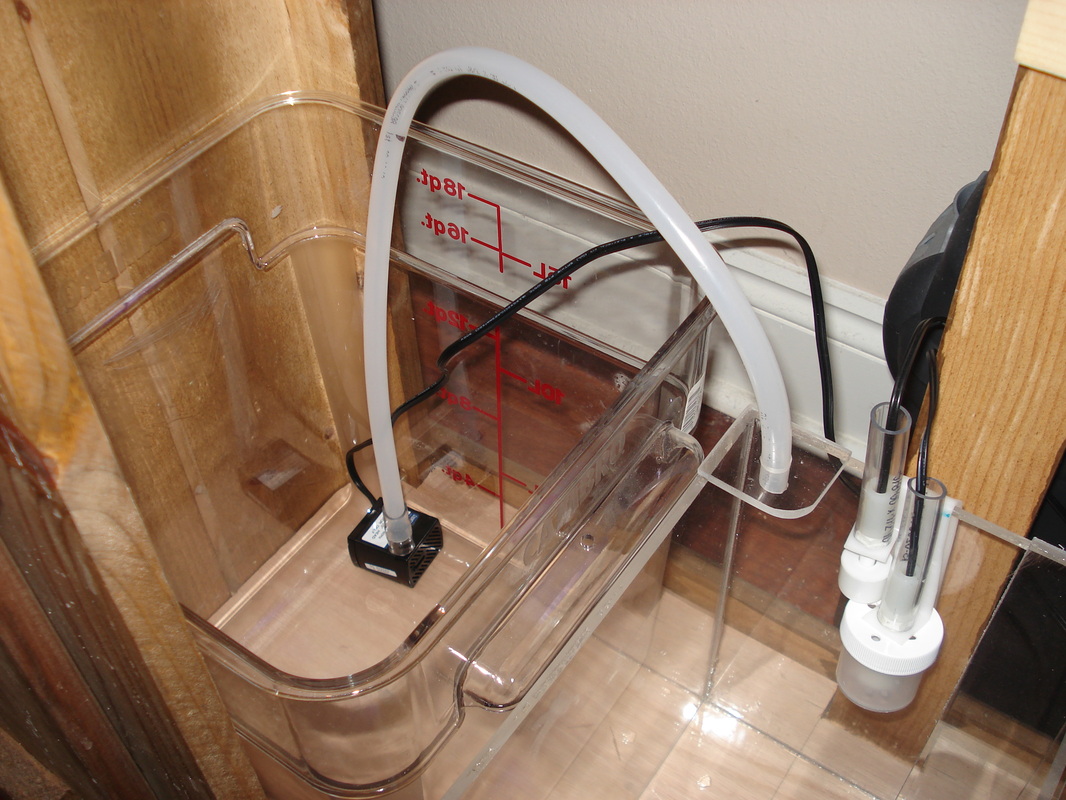
My ATO Build:
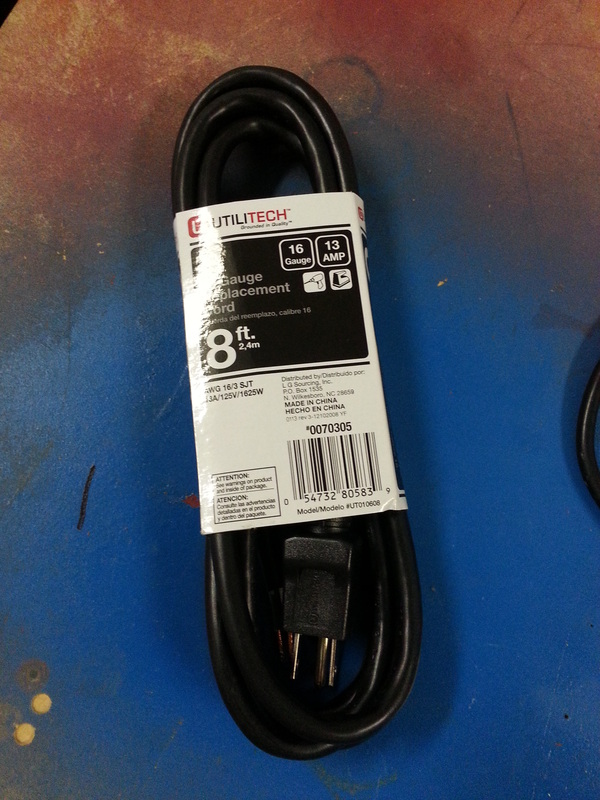
One of the smartest things I've done for my tank was install an Auto Top Off system to my tank. Trying to keep up with evaporation is tough, so an ATO is the way to go. While there are much more expensive systems to use, I decided to go with the system offered by Aquahub (www.aquahub.com). There system uses a double switch with a relay system. The second switch helps prevent floods if the first switch becomes stuck. Their system includes everything needed except for an extension cord and the actual pump. The cord and pump can be bought at Lowe's or Home Depot for just a few dollars. The pump only has to deliver a small amount of water so a high output pump is not needed. The first picture shows the completed system minus the pump. The second pictures shows the pump inside the container.
For my ATO container I bought a square acrylic food storage container. These can be purchased at any company that supplies the food service industry.
For my ATO container I bought a square acrylic food storage container. These can be purchased at any company that supplies the food service industry.
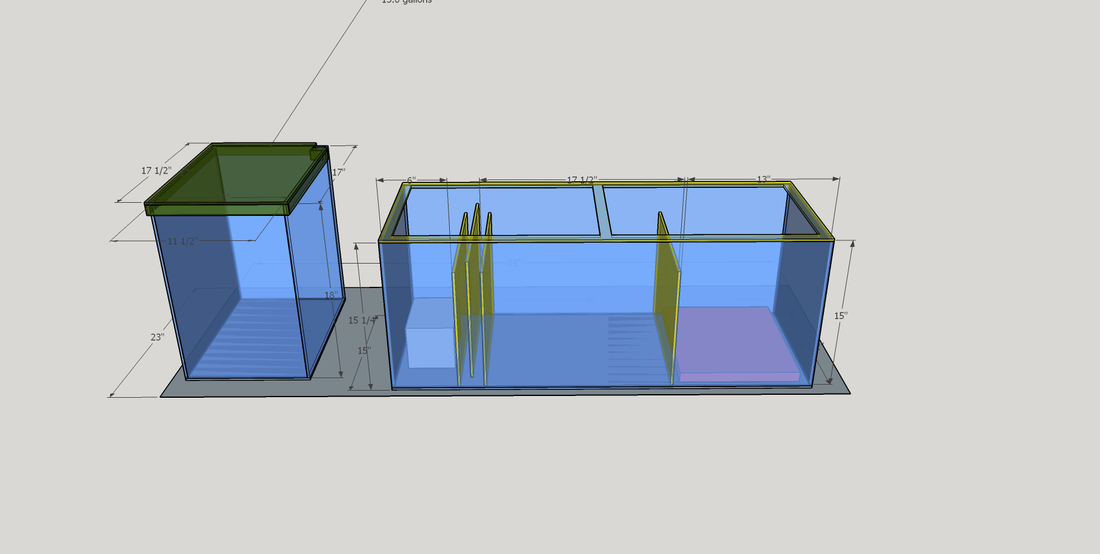
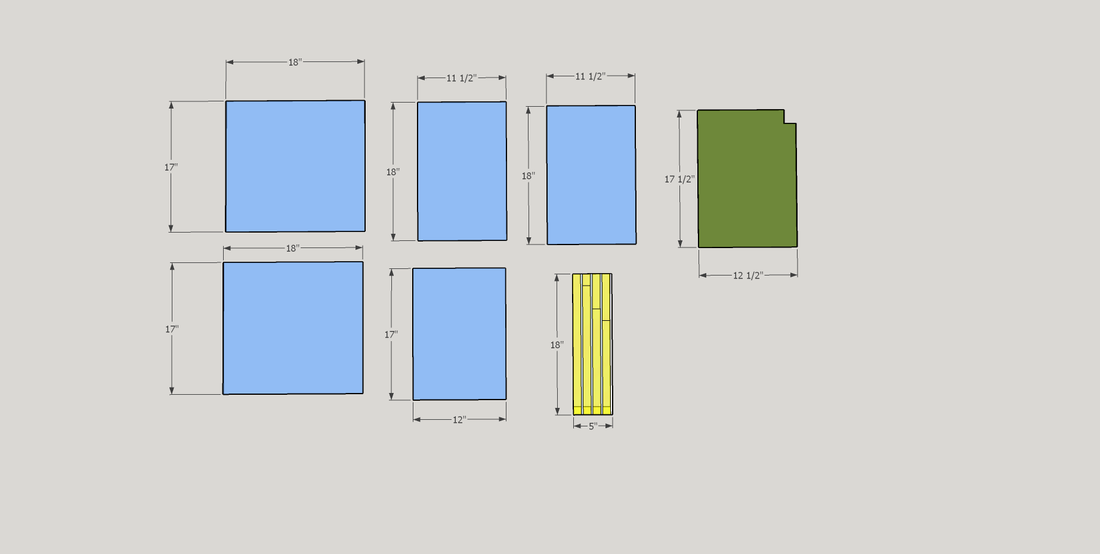
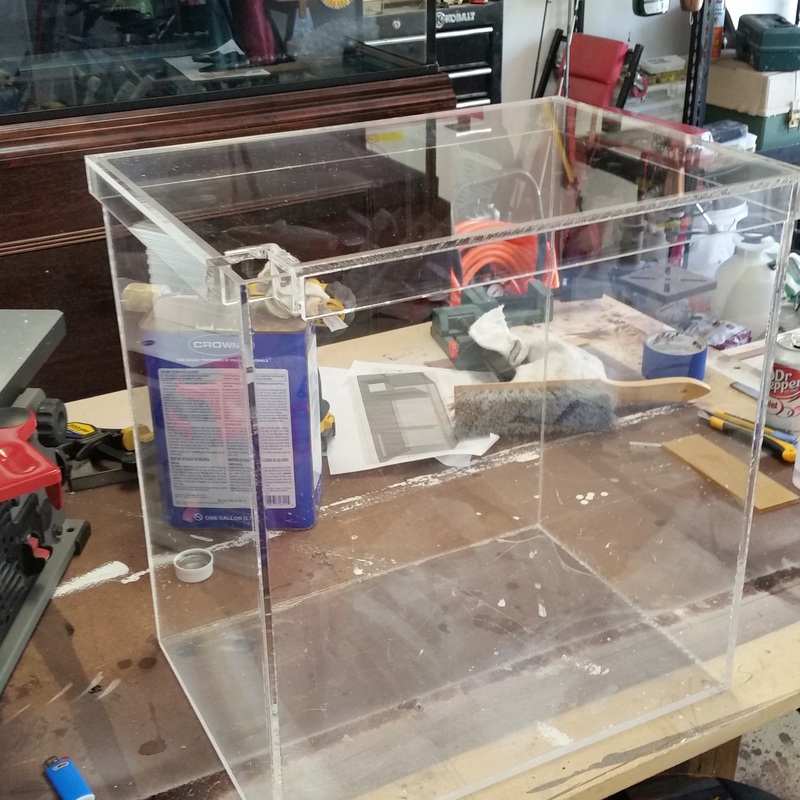
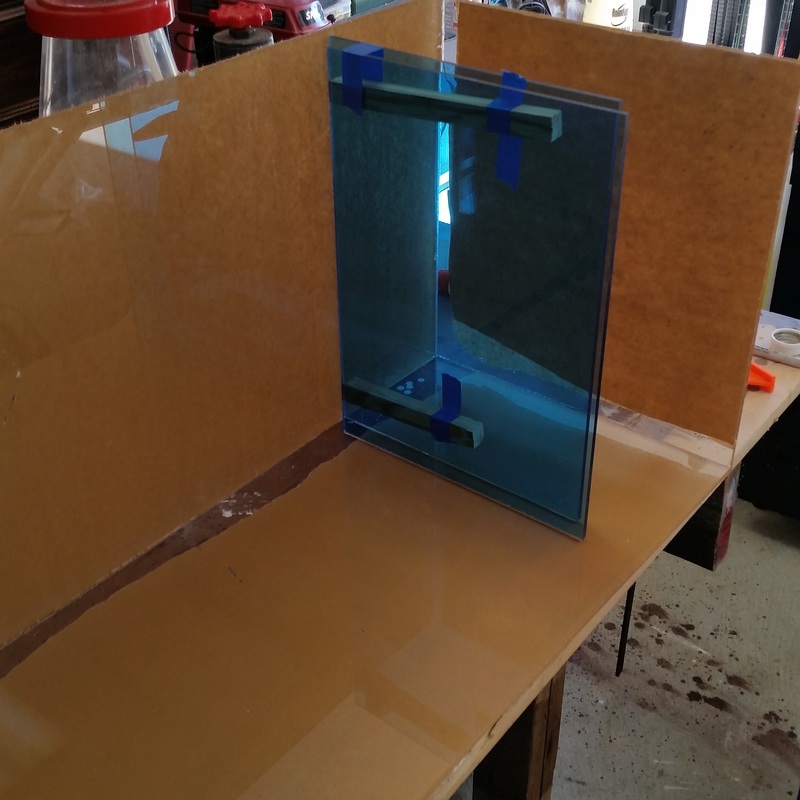
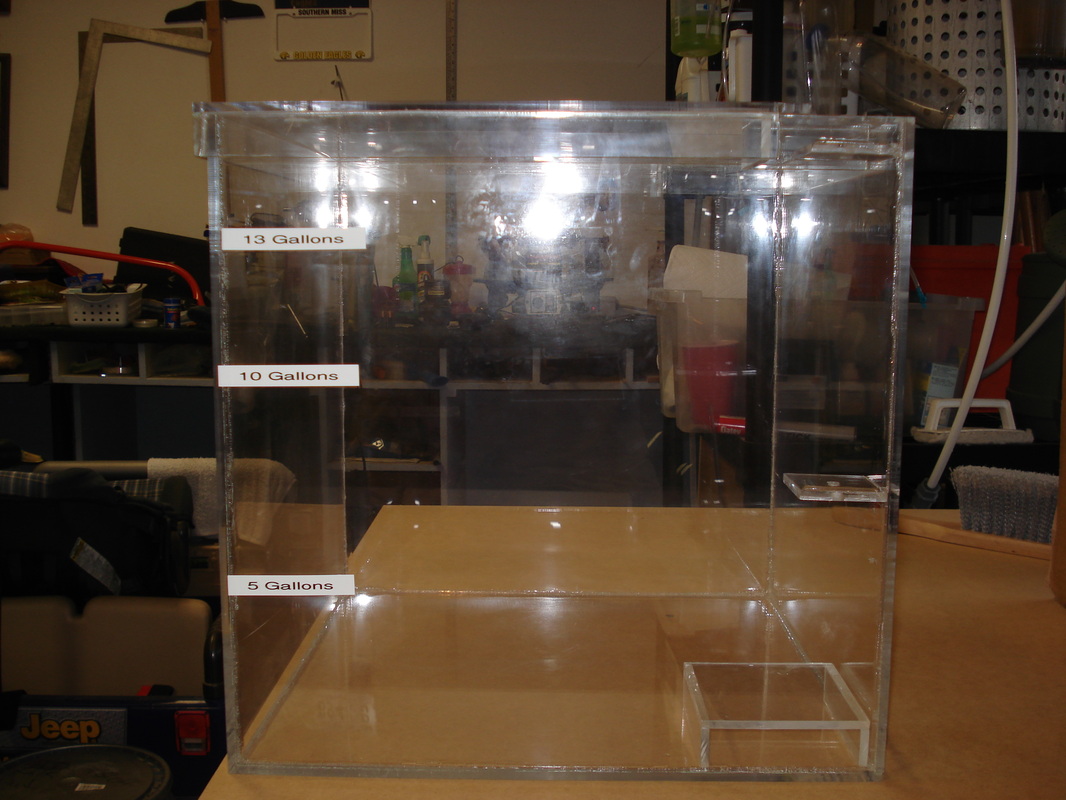
Acrylic Sump Build:
A sump is one of the most important items that can be added to a tank. A sump increases overall water volume, allows a place to hide equipment that would otherwise be unsightly in the display tank (heaters, protein skimmer), provides extra biological filtration and can provide an area to create a refugium. A sump is generally set up with a drain side, which usually houses the protein skimmer, a refugium (if size allows) and then the return. Regardless of style, a series of baffles are usually installed before the return side. These baffles are called bubble traps and help prevent small bubbles from entering the display tank.
I decided to add a sump well after my tank was set up and as such my options were limited. Given the style of my stand I could only go through the doors, however, my doors are separated by wood in the middle. This greatly limited the size of tank I could squeeze into the stand. A 10 gallon glass tank with trim wouldn't fit so I decided to build a sump out of acrylic.
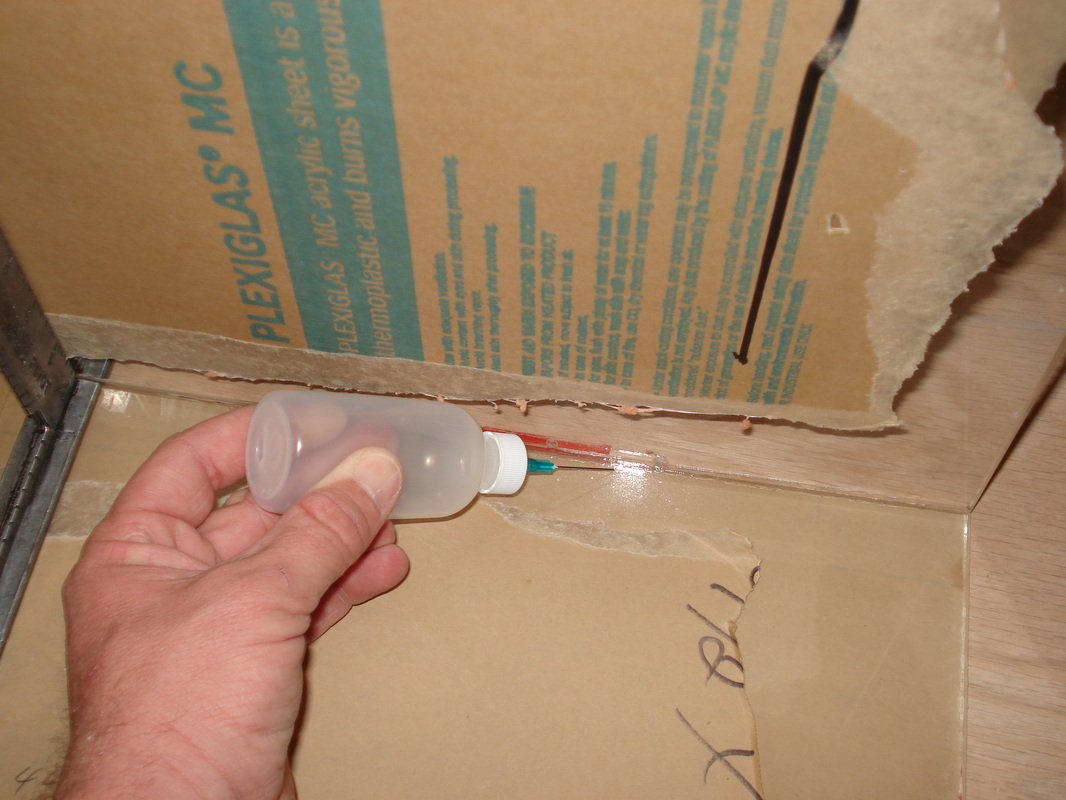
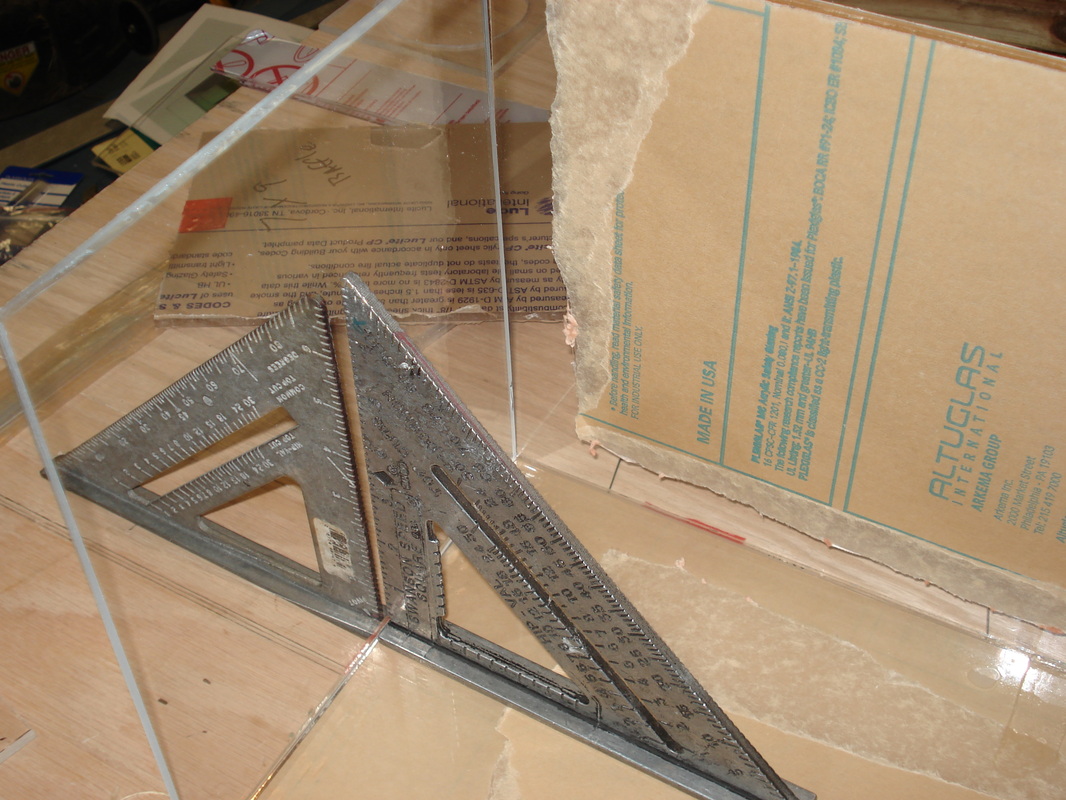
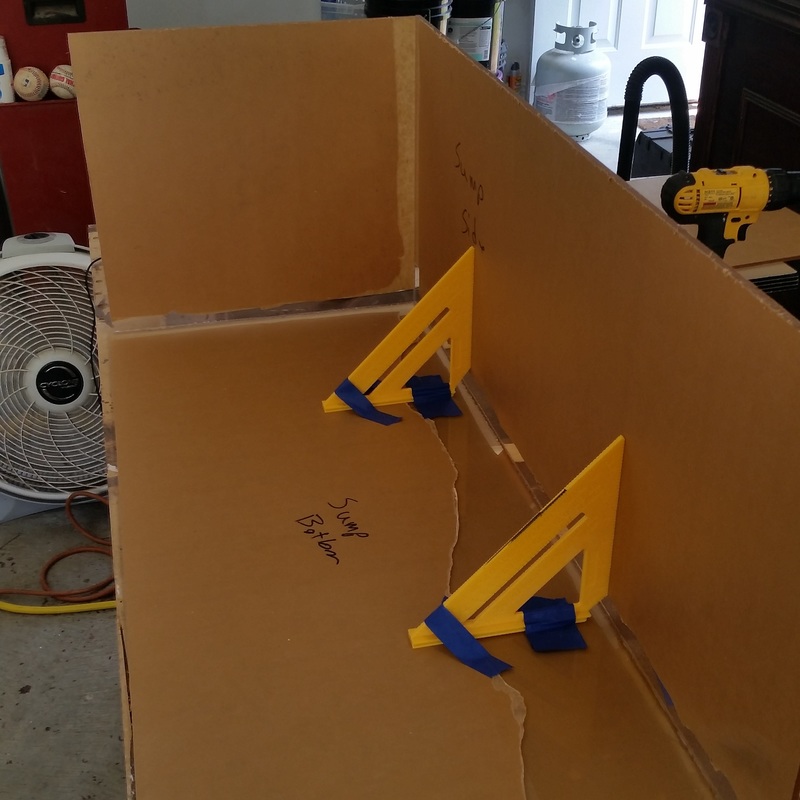
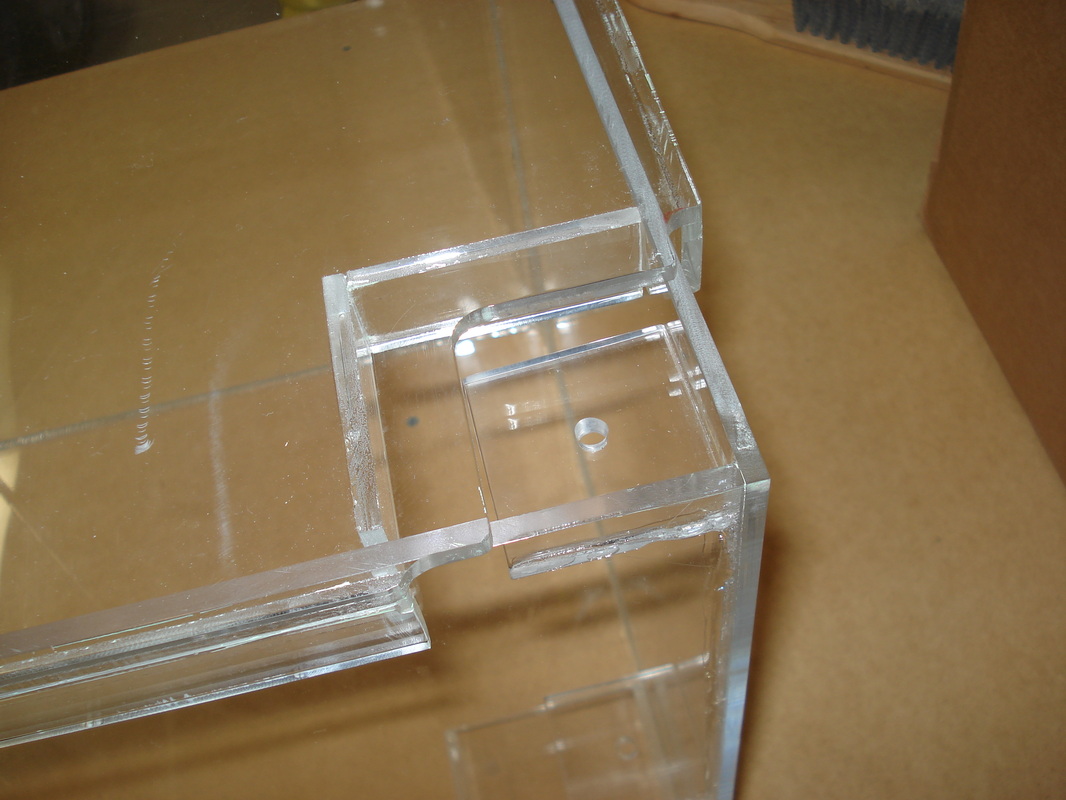
Working with acrylic is not hard, but does have a few requirements that must be followed for dependable seams. If you've ever worked with PVC pipe you can build with acrylic. The most important requirement is for all edges of the cut acrylic to be square. Acrylic is not actually glued but rather what is called "solvent welded". The solvent (glue) actually melts the acrylic together and then evaporates. The acrylic then re-hardens and if done correctly, creates a waterproof seam. There are many videos online showing how to do this.
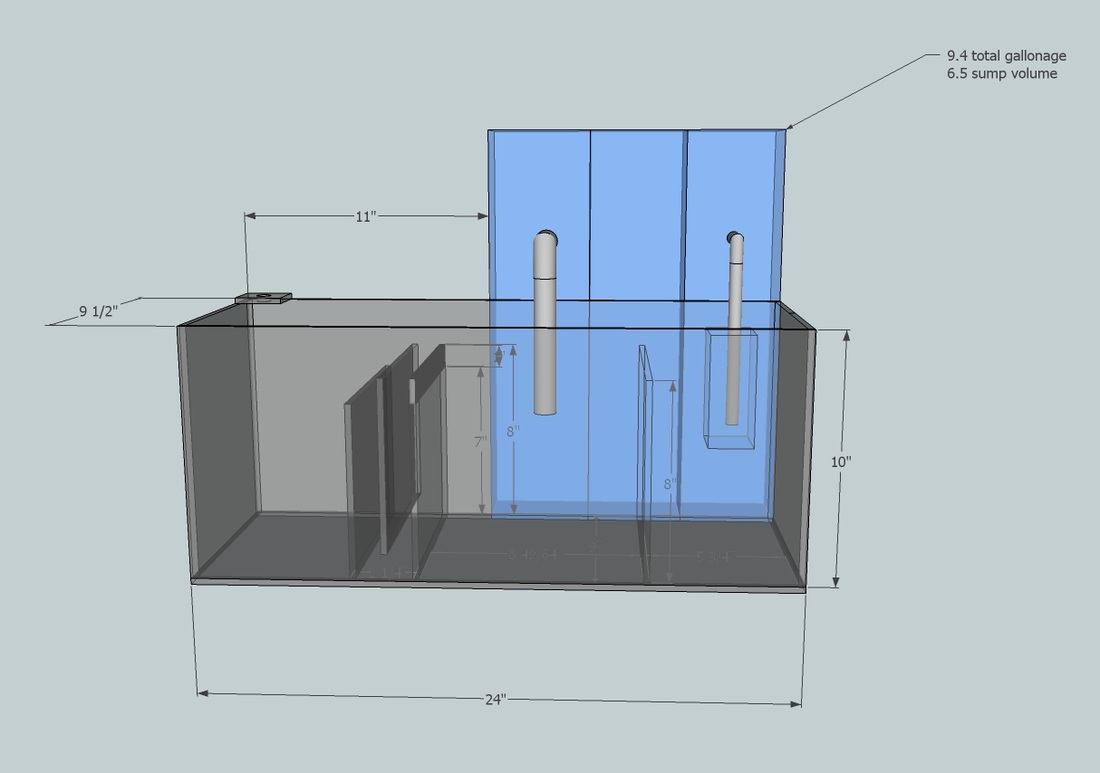
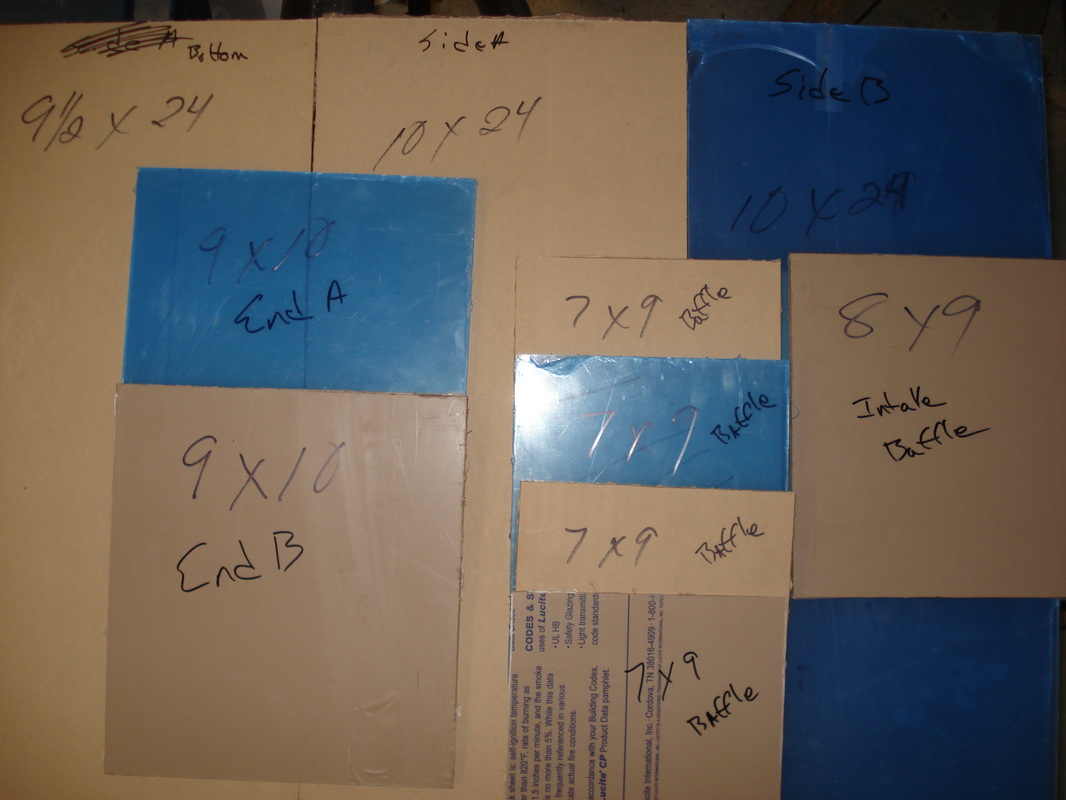
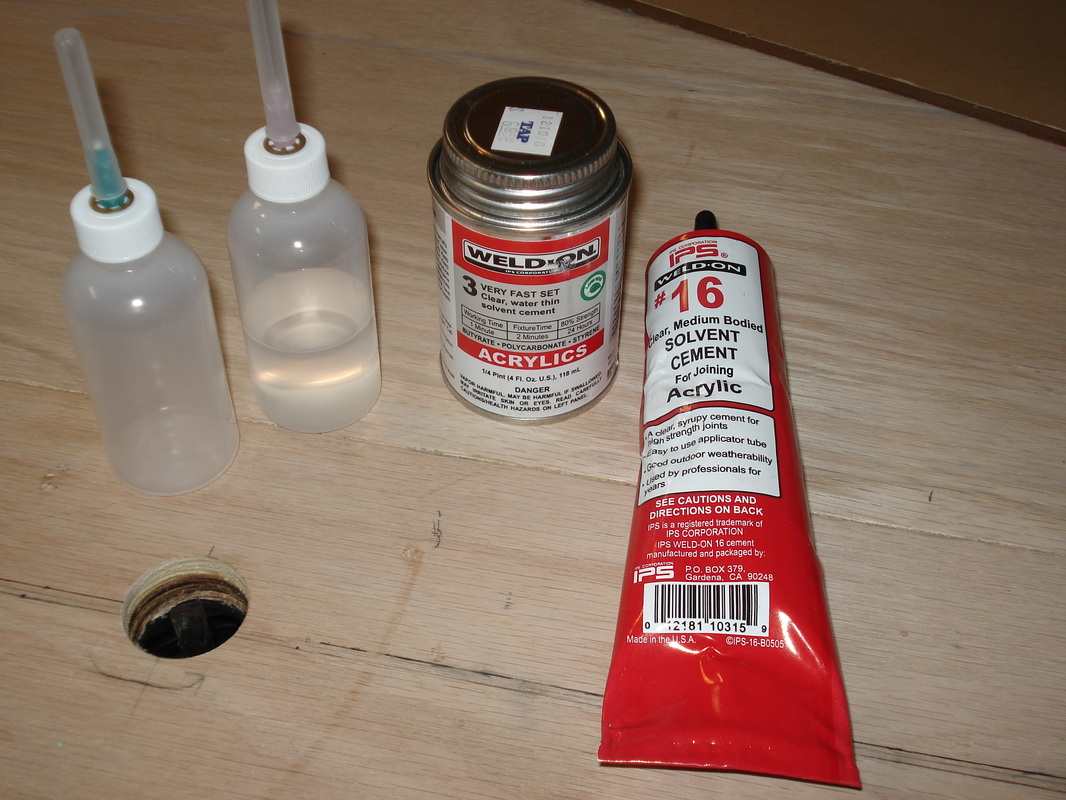
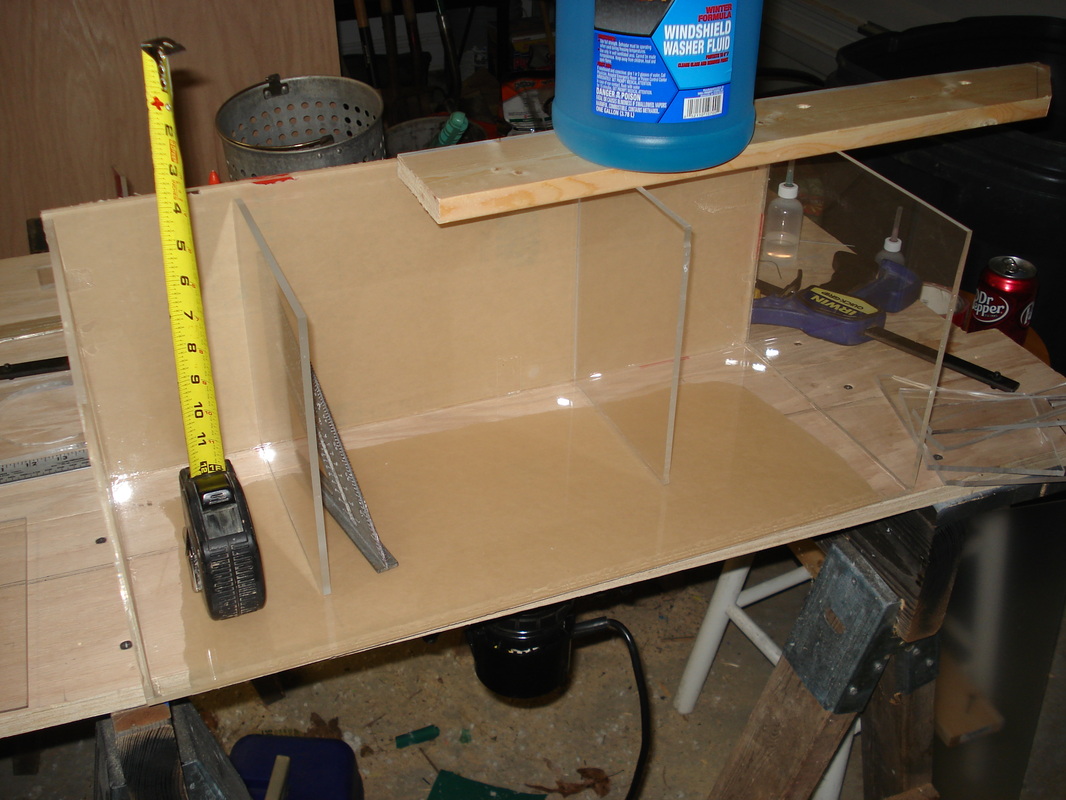
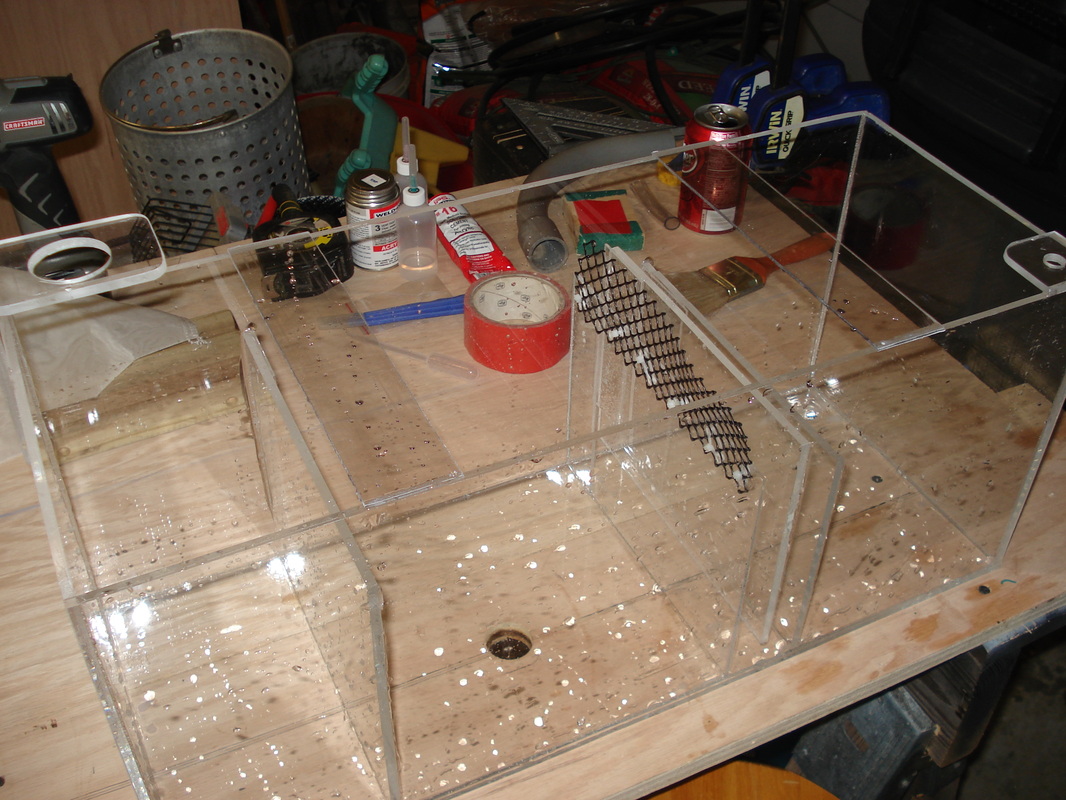
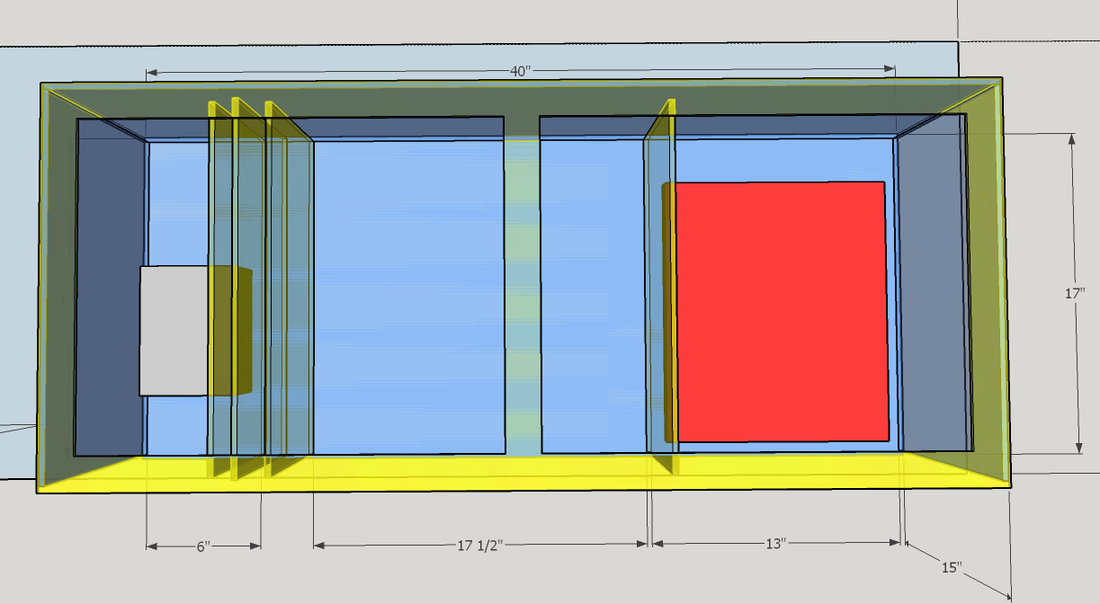
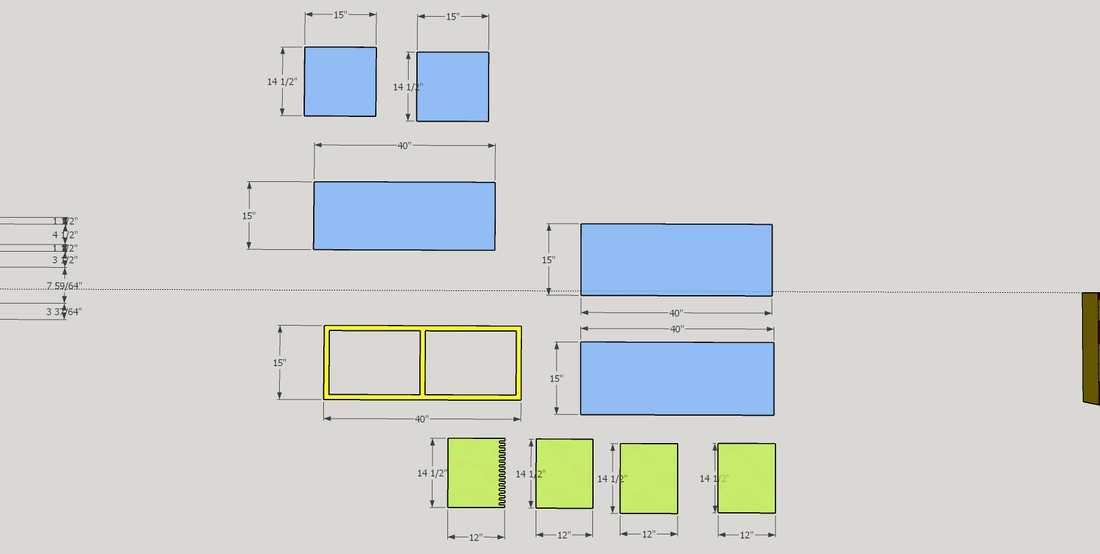
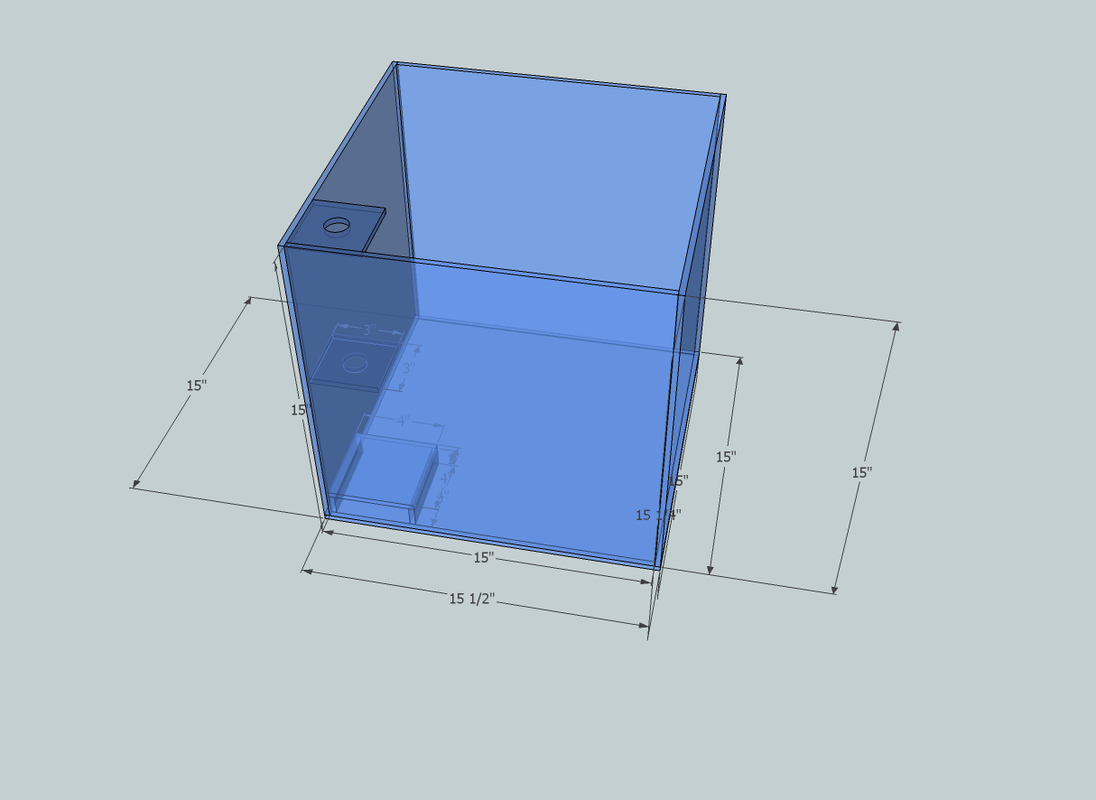
I designed my sump to be as large as possible, still fit and still be functional. My sump is approximately nine gallons. It is smaller than I would like, but at least I now have one. I designed my sump using Google Sketchup which is a great tool for DIY projects. I used 1/4" thick clear acrylic that I bought from a local glass shop. I had them cut it on their table to ensure a square edge, however it still wasn't perfect and I had to try and square it using sandpaper and a router. I had kind of planed for this by order two types of solvent. The usual solvent to weld with is a product called Weld-On 3. It is as thin as water and must be applied with a needle tip applicator. This solvent runs along the seams by capillary action. The second solvent I ordered was one called Weld-On 16. It is much thicker, almost like syrup. It is great for filling in gaps. I used it in all four corners as well as the bottom piece just to be safe.
All of the pics below show how the build was made and each step along the way.
I decided to add a sump well after my tank was set up and as such my options were limited. Given the style of my stand I could only go through the doors, however, my doors are separated by wood in the middle. This greatly limited the size of tank I could squeeze into the stand. A 10 gallon glass tank with trim wouldn't fit so I decided to build a sump out of acrylic.
Working with acrylic is not hard, but does have a few requirements that must be followed for dependable seams. If you've ever worked with PVC pipe you can build with acrylic. The most important requirement is for all edges of the cut acrylic to be square. Acrylic is not actually glued but rather what is called "solvent welded". The solvent (glue) actually melts the acrylic together and then evaporates. The acrylic then re-hardens and if done correctly, creates a waterproof seam. There are many videos online showing how to do this.
I designed my sump to be as large as possible, still fit and still be functional. My sump is approximately nine gallons. It is smaller than I would like, but at least I now have one. I designed my sump using Google Sketchup which is a great tool for DIY projects. I used 1/4" thick clear acrylic that I bought from a local glass shop. I had them cut it on their table to ensure a square edge, however it still wasn't perfect and I had to try and square it using sandpaper and a router. I had kind of planed for this by order two types of solvent. The usual solvent to weld with is a product called Weld-On 3. It is as thin as water and must be applied with a needle tip applicator. This solvent runs along the seams by capillary action. The second solvent I ordered was one called Weld-On 16. It is much thicker, almost like syrup. It is great for filling in gaps. I used it in all four corners as well as the bottom piece just to be safe.
All of the pics below show how the build was made and each step along the way.